GraphQL API
This is the main API of your application, as it allows you to:
- Modify data by sending commands.
- Read data by querying read models.
- Receive data in real time by subscribing to read models.
All this is done through GraphQL, a query language for APIs that has useful advantages over simple REST APIs.
If you are not familiar with GraphQL, then, first of all, don't worry! Using a GraphQL API is simple and straightforward. Implementing it on the server side is usually the hard part, as you need to define your schema, operations, resolvers, etc. Luckily, you can forget about that because Booster does all the work for you!
The GraphQL API is fully auto-generated based on your commands and read models.
To get the full potential of the GraphQL API, it is not recommended to use interface types in any command or read model attributes. Use class types instead. This will allow you to perform complex graphQL filters, including over nested attributes. There's an example below:
// My type
export class ItemWithQuantity {
  // Use "class", not "interface"
  public constructor(sku: string, quantity: number) {}
}
// The read-model file
import { ItemWithQuantity } from "./types";
@ReadModel({
  authorize: 'all'
})
export class CartReadModel {
  public constructor(
          readonly id: UUID,
          item: ItemWithQuantity // As ItemWithQuantity is a class, you will be able to query over nested attributes like item `quantity`
  ) {}
Relationship between GraphQL operations and commands and read models
GraphQL defines three kinds of operations that you can use: mutations, queries, and subscriptions.
The names are pretty meaningful, but we can say that you use a mutation when you want to change data, a query when you want to get
data on-demand, and a subscription when you want to receive data at the moment it is updated.
Knowing this, you can infer the relationship between those operations and your Booster components:
- You send a command using a mutation.
- You read a read model using a query.
- You subscribe to a read model using a subscription.
How to send GraphQL request
GraphQL uses two existing protocols:
- HTTP for
mutationandqueryoperations. - WebSocket for
subscriptionoperations.
The reason for the WebSocket protocol is that, in order for subscriptions to work, there must be a way for the server to send data to clients when it is changed. HTTP doesn't allow that, as it is the client the one which always initiates the request.
So you should use the graphqlURL to send GraphQL queries and mutations, and the websocketURL to send subscriptions. You can see both URLs after deploying your application.
Therefore:
- To send a GraphQL mutation/query, you send an HTTP request to "<graphqlURL>", with method POST, and a JSON-encoded body with the mutation/query details.
- To send a GraphQL subscription, you first connect to the "<websocketURL>", and then send a JSON-encoded message with the subscription details, following the "GraphQL over WebSocket" protocol.
You can also send queries and mutations through the WebSocket if that's convenient to you. See "The GraphQL over WebSocket protocol" to know more.
While it is OK to know how to manually send GraphQL request, you normally don't need to deal with this low-level details, especially with the WebSocket stuff.
To have a great developer experience, we strongly recommend to use a GraphQL client for your platform of choice. Here are some great ones:
- Altair: Ideal for testing sending manual requests, getting the schema, etc.
- Apollo clients: These are the "go-to" SDKs to interact with a GraphQL API from your clients. It is very likely that there is a version for your client programming language. Check the "Using Apollo Client" section to know more about this.
Get GraphQL schema from deployed application
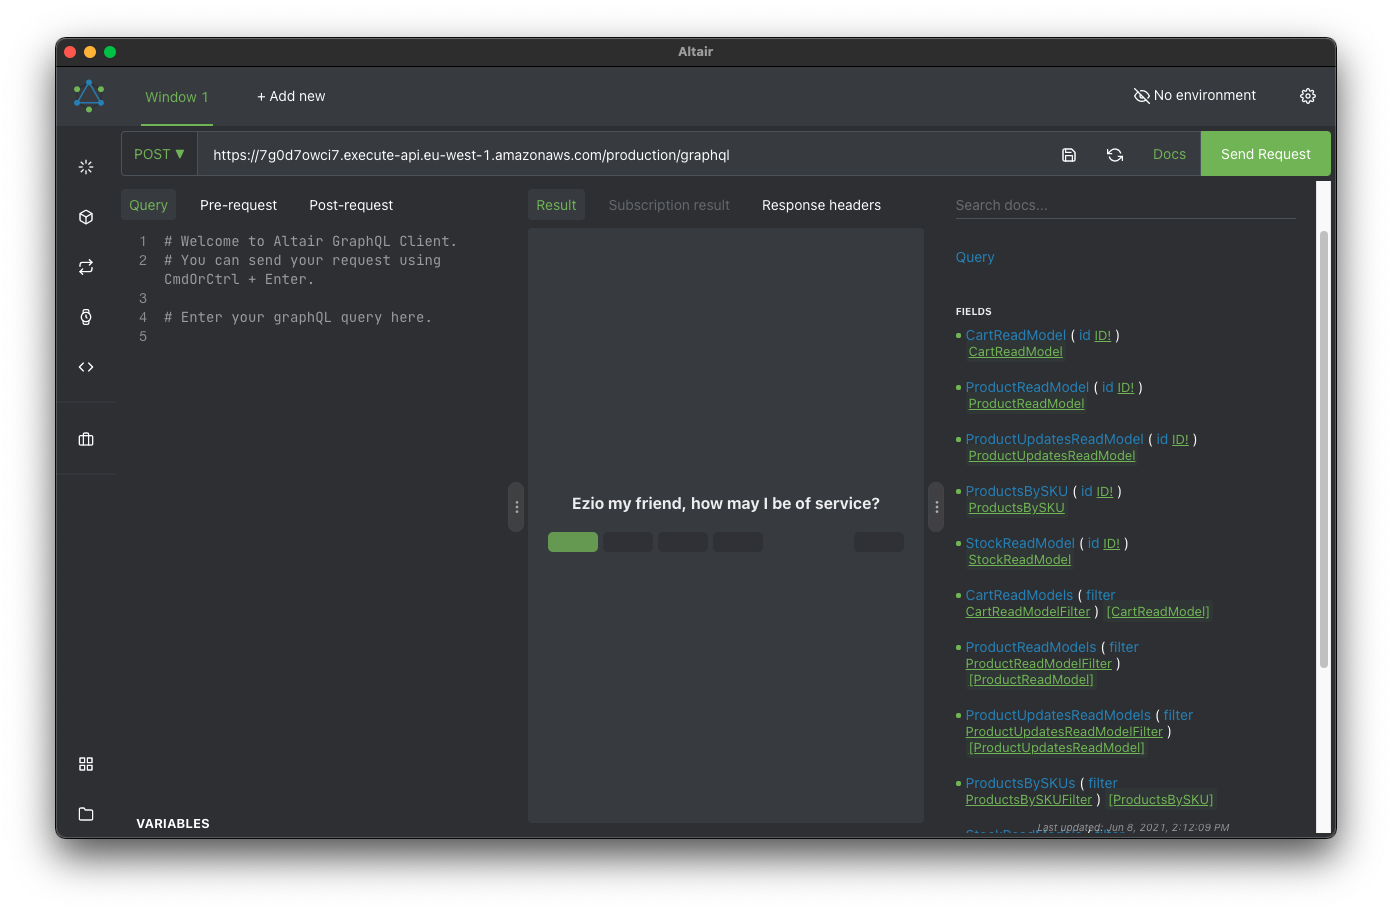
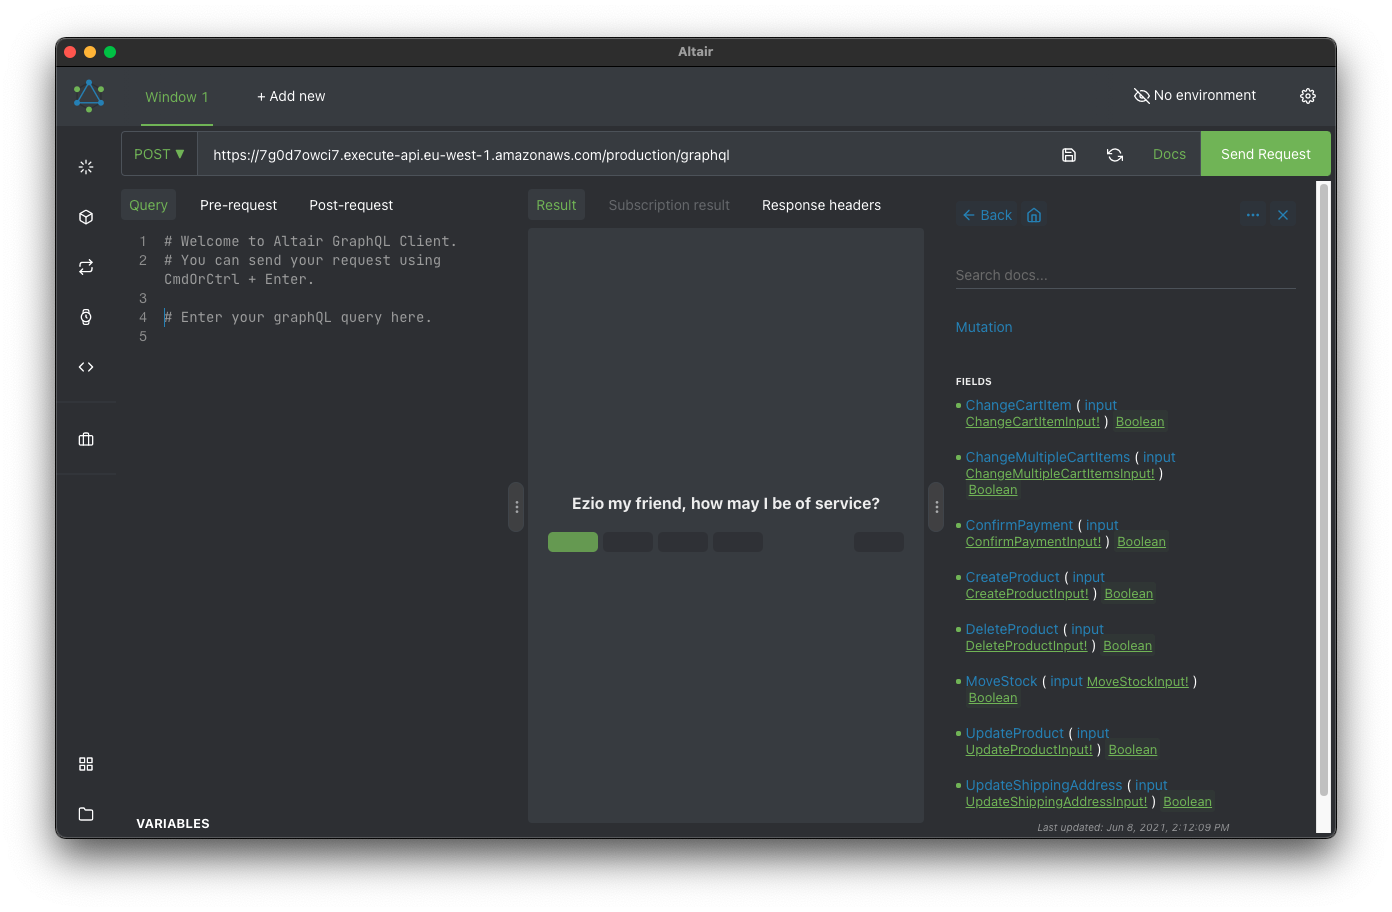
After deploying your application with the command boost deploy -e development, you can get your GraphQL schema by using a tool like Altair. The previous command displays multiple endpoints, one of them is graphqlURL, which has the following pattern:
https://<base_url>/<environment>/graphql
By entering this URL in Altair, the schema can be displayed as shown in the screenshot (You need to click on the Docs button in the URL bar). You can check the available Queries and Mutations by clicking on their name:
Sending commands
As mentioned in the previous section, we need to use a "mutation" to send a command. The structure of a mutation (the body of the request) is the following:
mutation {
  command_name(input: {
    input_field_list
  })
}
Where:
- command_name is the name of the class corresponding to the command you want to send
- input_field_list is a list of pairs in the form of
fieldName: fieldValuecontaining the data of your command. The field names correspond to the names of the properties you defined in the command class.
In the following example we send a command named "ChangeCart" that will add/remove an item to/from a shopping cart. The command requires the ID of the cart (cartId), the item identifier (sku) and the quantity of units we are adding/removing (quantity).
URL: "<graphqlURL>"
mutation {
  ChangeCart(input: { cartId: "demo", sku: "ABC_01", quantity: 2 })
}
In case we are not using any GraphQL client, this would be the equivalent bare HTTP request:
URL: "<graphqlURL>"
METHOD: "POST"
{
  "query": "mutation { ChangeCart(input: { cartId: \"demo\" sku: \"ABC_01\" quantity: 2 }) }"
}
And this would be the response:
{
  "data": {
    "ChangeCart": true
  }
}
Remember to set the proper access token for secured commands, check "Authorizing operations".
Reading read models
To read a specific read model, we need to use a "query" operation. The structure of the "query" (the body of the request) is the following:
query {
  read_model_name(id: "<id of the read model>") {
    selection_field_list
  }
}
Where:
- read_model_name is the name of the class corresponding to the read model you want to retrieve.
- <id of the read model> is the ID of the specific read model instance you are interested in.
- selection_field_list is a list with the names of the specific read model fields you want to get as response.
In the following example we send a query to read a read model named CartReadModel whose ID is demo. We get back its id and the list of cart items as response.
URL: "<graphqlURL>"
query {
  CartReadModel(id: "demo") {
    id
    items
  }
}
In case we are not using any GraphQL client, this would be the equivalent bare HTTP request:
URL: "<graphqlURL>"
METHOD: "POST"
{
  "query": "query { CartReadModel(id: \"demo\") { id items } }"
}
And we would get the following as response:
{
  "data": {
    "CartReadModel": {
      "id": "demo",
      "items": [
        {
          "sku": "ABC_01",
          "quantity": 2
        }
      ]
    }
  }
}
Remember to set the proper access token for secured read models, check "Authorizing operations".
Subscribing to read models
To subscribe to a specific read model, we need to use a subscription operation, and it must be sent through the websocketURL using the GraphQL over WebSocket protocol.
Doing this process manually is a bit cumbersome. You will probably never need to do this, as GraphQL clients like Apollo abstract this process away. However, we will explain how to do it for learning purposes.
Before sending any subscription, you need to connect to the WebSocket to open the two-way communication channel. This connection is done differently depending on the client/library you use to manage web sockets. In this section, we will show examples using the wscat command line program. You can also use the online tool Altair
Once you have connected successfully, you can use this channel to:
- Send the subscription messages.
- Listen for messages sent by the server with data corresponding to your active subscriptions.
The structure of the "subscription" (the body of the message) is exactly the same as the "query" operation:
subscription {
  read_model_name(id: "<id of the read model>") {
    selection_field_list
  }
}
Where:
- read_model_name is the name of the class corresponding to the read model you want to subscribe to.
- <id of the read model> is the ID of the specific read model instance you are interested in.
- selection_field_list is a list with the names of the specific read model fields you want to get when data is sent back to you.
In the following examples we use wscat to connect to the web socket. After that, we send the required messages to conform the GraphQL over WebSocket protocol, including the subscription operation to the read model CartReadModel with ID demo.
- Connect to the web socket:
wscat -c <websocketURL> -s graphql-ws
You should specify the graphql-ws subprotocol when connecting with your client via the Sec-WebSocket-Protocol header (in this case, wscat does that when you use the -s option).
Now we can start sending messages just by writing them and hitting the Enter key.
- Initiate the protocol connection :
{ "type": "connection_init" }
In case you want to authorize the connection, you need to send the authorization token in the payload.Authorization field:
{ "type": "connection_init", "payload": { "Authorization": "<your token>" } }
- Send a message with the subscription. We need to provide an ID for the operation. When the server sends us data back, it will include this same ID so that we know which subscription the received data belongs to (again, this is just for learning, GraphQL clients manages this for you)
{ "id": "1", "type": "start", "payload": { "query": "subscription { CartReadModel(id:\"demo\") { id items } }" } }
After a successful subscription, you won't receive anything in return. Now, every time the read model you subscribed to is modified, a new incoming message will appear in the socket with the updated version of the read model. This message will have exactly the same format as if you were done a query with the same parameters.
Following with the previous example, we now send a command (using a mutation operation) that adds a new item with sku "ABC_02" to the CartReadModel. After it has been added, we receive the updated version of the read model through the socket.
- Send the following command (this time using an HTTP request):
URL: "<graphqlURL>"
mutation {
  ChangeCart(input: { cartId: "demo", sku: "ABC_02", quantity: 3 })
}
- The following message (after formatting it) appears through the socket connection we had opened:
{
  "id": "1",
  "type": "data",
  "payload": {
    "data": {
      "CartReadModel": {
        "id": "demo",
        "items": [
          {
            "sku": "ABC_01",
            "quantity": 2
          },
          {
            "sku": "ABC_02",
            "quantity": 3
          }
        ]
      }
    }
  }
}
Remember that, in case you want to subscribe to a read model that is restricted to a specific set of roles, you must send the access token retrieved upon sign-in. Check "Authorizing operations" to know how to do this.
You can disable the creation of all the infrastructure and functionality needed to manage subscriptions by setting config.enableSubscriptions=false in your Booster.config block
Non exposing properties and parameters
By default, all properties and parameters of the command constructor and/or read model are accessible through GraphQL. It is possible to not expose any of them adding the @NonExposed annotation to the constructor property or parameter.
Example
@ReadModel({
  authorize: 'all',
})
export class CartReadModel {
  @NonExposed
  private internalProperty: number

  public constructor(
    readonly id: UUID,
    readonly cartItems: Array<CartItem>,
    readonly checks: number,
    public shippingAddress?: Address,
    public payment?: Payment,
    public cartItemsIds?: Array<string>,
    @NonExposed readonly internalParameter?: number
  ) {
    ...
  }

  ...
}
Adding before hooks to your read models
When you send queries or subscriptions to your read models, you can tell Booster to execute some code before executing the operation. These are called before hooks, and they receive a ReadModelRequestEnvelope object representing the current request.
interface ReadModelRequestEnvelope<TReadModel> {
  currentUser?: UserEnvelope // The current authenticated user
  requestID: UUID // An ID assigned to this request
  key?: { // If present, contains the id and sequenceKey that identify a specific read model
    id: UUID
    sequenceKey?: SequenceKey
  }
  className: string // The read model class name
  filters: ReadModelRequestProperties<TReadModel> // Filters set in the GraphQL query
  limit?: number // Query limit if set
  afterCursor?: unknown // For paginated requests, id to start reading from
}
In before hooks, you can either abort the request or alter and return the request object to change the behavior of your request. Before hooks are useful for many use cases, but they're especially useful to add fine-grained access control. For example, to enforce a filter that restrict a logged in user to access only read models objects they own.
When a before hook throws an exception, the request is aborted and the error is sent back to the user. In order to continue with the request, it's required that the request object is returned.
In order to define a before hook you pass a list of functions with the right signature to the read model decorator before parameter:
@ReadModel({
  authorize: [User],
  before: [validateUser],
})
export class CartReadModel {
  public constructor(
    readonly id: UUID,
    readonly userId: UUID
  ) {}
  // Your projections go here
}

function validateUser(request: ReadModelRequestEnvelope<CartReadModel>): ReadModelRequestEnvelope<CartReadModel> {
  if (request.filters?.userId?.eq !== request.currentUser?.id) throw NotAuthorizedError("...")
  return request
}
You can also define more than one before hook for a read model, and they will be chained, sending the resulting request object from a hook to the next one.
The order in which filters are specified matters.
import { changeFilters } from '../../filters-helper' // You can also use external functions!

@ReadModel({
  authorize: [User],
  before: [validateUser, validateEmail, changeFilters],
})
export class CartReadModel {
  public constructor(
    readonly id: UUID,
    readonly userId: UUID
  ) {}

  // Your projections go here
}

function validateUser(request: ReadModelRequestEnvelope<CartReadModel>): ReadModelRequestEnvelope<CartReadModel> {
  if (request.filters?.userId?.eq !== request.currentUser?.id) throw NotAuthorizedError("...")
  return request
}

function validateEmail(request: ReadModelRequestEnvelope<CartReadModel>): ReadModelRequestEnvelope<CartReadModel> {
  if (!request.filters.email.includes('myCompanyDomain.com')) throw NotAuthorizedError("...")
  return request
}
Adding before hooks to your commands
You can use before hooks also in your command handlers, and they work as the Read Models ones, with a slight difference: we don't modify filters but inputs (the parameters sent with a command). Apart from that, it's pretty much the same, here's an example:
@Command({
  authorize: [User],
  before: [beforeFn],
})
export class ChangeCartItem {
  public constructor(readonly cartId: UUID, readonly productId: UUID, readonly quantity: number) {
  }
}

function beforeFn(input: CommandInput, currentUser?: UserEnvelope): CommandInput {
  if (input.cartUserId !== currentUser.id) {
    throw NonAuthorizedUserException() // We don't let this user to trigger the command
  }
  return input
}
As you can see, we just check if the cartUserId is equal to the currentUser.id, which is the user id extracted from the auth token. This way, we can throw an exception and avoid this user to call this command.
Adding before hooks to your queries
You can use before hooks also in your queries, and they work as the Read Models ones, with a slight difference: we don't modify filters but inputs (the parameters sent with a query). Apart from that, it's pretty much the same, here's an example:
@Query({
  authorize: 'all',
  before: [CartTotalQuantity.beforeFn],
})
export class CartTotalQuantity {
  public constructor(readonly cartId: UUID, @NonExposed readonly multiply: number) {}

  public static async beforeFn(input: QueryInput, currentUser?: UserEnvelope): Promise<QueryInput> {
    input.multiply = 100
    return input
  }
}
Reading events
You can also fetch events directly if you need. To do so, there are two kind of queries that have the following structure:
query {
  eventsByEntity(entity: <name of entity>, entityID: "<id of the entity>") {
    selection_field_list
  }
}

query {
  eventsByType(type: <name of event>) {
    selection_field_list
  }
}
Where:
- <name of your entity> is the name of the class corresponding to the entity whose events you want to retrieve.
- <id of the entity> is the ID of the specific entity instance whose events you are interested in. This is optional
- <name of event> is the name of the class corresponding to the event type whose instances you want to retrieve.
- selection_field_list is a list with the names of the specific fields you want to get as response. See the response example below to know more.
Examples
URL: "<graphqlURL>"
A) Read all events associated with a specific instance (a specific ID) of the entity Cart
query {
  eventsByEntity(entity: Cart, entityID: "ABC123") {
    type
    entity
    entityID
    requestID
    createdAt
    value
  }
}
B) Read all events associated with any instance of the entity Cart
query {
  eventsByEntity(entity: Cart) {
    type
    entity
    entityID
    requestID
    createdAt
    value
  }
}
For these cases, you would get an array of event envelopes as a response. This means that you get some metadata related to the event along with the event content, which can be found inside the "value" field.
The response look like this:
{
  "data": {
    "eventsByEntity": [
      {
        "type": "CartItemChanged",
        "entity": "Cart",
        "entityID": "ABC123",
        "requestID": "7a9cc6a7-7c7f-4ef0-aef1-b226ae4d94fa",
        "createdAt": "2021-05-12T08:41:13.792Z",
        "value": {
          "productId": "73f7818c-f83e-4482-be49-339c004b6fdf",
          "cartId": "ABC123",
          "quantity": 2
        }
      }
    ]
  }
}
C) Read events of a specific type
query {
  eventsByType(type: CartItemChanged) {
    type
    entity
    entityID
    requestID
    createdAt
    value
  }
}
The response would have the same structure as seen in the previous examples. The only difference is that this time you will get only the events with the type you have specified ("CartItemChanged")
Time filters
Optionally, for any of the previous queries, you can include a from and/or to time filters to get only those events that happened inside that time range. You must use a string with a time in ISO format with any precision you like, for example:
from:"2021": Events created on 2021 year or up.from:"2021-02-12" to:"2021-02-13": Events created during February 12th.from:"2021-03-16T16:16:25.178": Events created at that date and time, using millisecond precision, or later.
Time filters examples
A) Cart events from February 23rd to July 20th, 2021
query {
  eventsByEntity(entity: Cart, from: "2021-02-23", to: "2021-07-20") {
    type
    entity
    entityID
    requestID
    createdAt
    value
  }
}
B) CartItemChanged events from February 25th to February 28th, 2021
query {
  eventsByType(type: CartItemChanged, from: "2021-02-25", to: "2021-02-28") {
    type
    entity
    entityID
    requestID
    createdAt
    value
  }
}
Known limitations
- Subscriptions don't work for the events API yet
- You can only query events, but not write them through this API. Use a command for that.
Filter, Pagination and Projections
Filtering a read model
The Booster GraphQL API provides support for filtering Read Models on queries and subscriptions.
Using the GraphQL API endpoint you can retrieve the schema of your application so you can see what are the filters for every Read Model and its properties. You can filter like this:
Searching for a specific Read Model by id
query {
  ProductReadModels(filter: { id: { eq: "test-id" } }) {
    id
    sku
    availability
    price
  }
}
Supported filters
The currently supported filters are the following ones:
Boolean filters
| Filter | Value | Description |
|---|---|---|
| eq | true/false | Equal to |
| ne | true/false | Not equal to |
Example:
query {
  ProductReadModels(filter: { availability: { eq: true } }) {
    id
    sku
    availability
    price
  }
}
Number filters
| Filter | Value | Description |
|---|---|---|
| eq | Float | Equal to |
| ne | Float | Not equal to |
| gt | Float | Greater than |
| gte | Float | Greater or equal than |
| lt | Float | Lower than |
| lte | Float | Lower or equal than |
| in | [Float] | Exists in given array |
Example:
query {
  ProductReadModels(filter: { price: { gt: 200 } }) {
    id
    sku
    availability
    price
  }
}
String filters
| Filter | Value | Description |
|---|---|---|
| eq | String | Equal to |
| ne | String | Not equal to |
| gt | String | Greater than |
| gte | String | Greater or equal than |
| lt | String | Lower than |
| lte | String | Lower or equal than |
| in | [String] | Exists in given array |
| beginsWith | String | Starts with a given substr |
| contains | String | Contains a given substr |
| regex* | String | Regular expression |
| iRegex* | String | Case insensitive Regular expression |
NOTE:
regex and iRegex are supported by Azure and Local Provider only
Example:
query {
  ProductReadModels(filter: { sku: { begingsWith: "jewelry" } }) {
    id
    sku
    availability
    price
  }
}
eq and ne are valid filters for checking if a field value is null or not null.
Array filters
| Filter | Value | Description |
|---|---|---|
| includes | Object | Includes a given object |
Example:
query {
  CartReadModels(filter: { itemsIds: { includes: "test-item" } }) {
    id
    price
    itemsIds
  }
}
Right now, with complex properties in Arrays, you just can filter them if you know the exact value of an element but is not possible to filter from a property of the element. As a workaround, you can use an array of ids of the complex property and filter for that property as in the example above.
Filter combinators
All the filters can be combined to create a more complex search on the same properties of the ReadModel.
| Filter | Value | Description |
|---|---|---|
| and | [Filters] | AND - all filters on the list have a match |
| or | [Filters] | OR - At least one filter of the list has a match |
| not | Filter/and/or | The element does not match the filter |
Example:
query {
  CartReadModels(filter: { or: [{ id: { contains: "a" } }, { id: { contains: "b" } }] }) {
    id
    price
    itemsIds
  }
}
IsDefined operator
| Filter | Value | Description |
|---|---|---|
| isDefined | true/false | field exists or not |
Example:
query {
  CartReadModels(filter: { price: { isDefined: true } }) {
    id
    price
    itemsIds
  }
}
Getting, filtering and projecting read models data at code level
Booster allows you to get your read models data in your commands handlers and event handlers using the Booster.readModel method.
For example, you can filter and get the total number of the products that meet your criteria in your commands like this:
@Command({
  authorize: 'all',
})
export class GetProductsCount {
  public constructor(readonly filters: Record<string, any>) {}

  public static async handle(): Promise<void> {
    const searcher = Booster.readModel(ProductReadModel)

    searcher.filter({
      sku: { contains: 'toy' },
      or: [
        {
          description: { contains: 'fancy' },
        },
        {
          description: { contains: 'great' },
        },
      ],
    })

    const result = await searcher.search()
    return { count: result.length }
  }
}
You can select which fields you want to get in your read model using the select method:
@Command({
  authorize: 'all',
})
export class GetProductsCount {
  public constructor(readonly filters: Record<string, any>) {}

  public static async handle(): Promise<unknown> {
    const searcher = Booster.readModel(ProductReadModel)
            .filter({
              sku: { contains: 'toy' },
              or: [
                {
                  description: { contains: 'fancy' },
                },
                {
                  description: { contains: 'great' },
                },
              ],
            })
            .select(['sku', 'description'])
    const result = await searcher.search()
    return { count: result.length }
  }
}
The searcher result using select will generate an array of objects with the sku and description fields of the ProductReadModel read model. If you don't use select the result will be an array of ProductReadModel instances.
You can also select properties in objects which are part of an array property in a model. For that, the parent array properties need to be notated with the [] suffix. For example:
@Command({
  authorize: 'all',
})
export class GetCartItems {
  public constructor(readonly filters: Record<string, any>) {}

  public static async handle(): Promise<unknown> {
    const searcher = Booster.readModel(CartReadModel)
            .select(['id', 'cartItems[].productId'])
    const result = await searcher.search()
    return { count: result.length }
  }
}
The above search will return an array of carts with their id property, as well as an array of the cartItems of each cart with only the productId for each item.
Only available for Azure and Local Providers. select will be ignored for AWS Provider.
Using select will skip any Read Models migrations that need to be applied to the result. If you need to apply migrations to the result, don't use select.
Support for selecting fields from objects inside arrays is limited to arrays that are at most nested inside another property, e.g., ['category.relatedCategories[].name']. Selecting fields from arrays that are nested deeper than that (e.g., ['foo.bar.items[].id']) will return the entire object.
Notice that ReadModels are eventually consistent objects that are calculated as all events in all entities that affect the read model are settled. You should not assume that a read model is a proper source of truth, so you shouldn't use this feature for data validations. If you need to query the most up-to-date current state, consider fetching your Entities, instead of ReadModels, with Booster.entity
Using sorting
Booster allows you to sort your read models data in your commands handlers and event handlers using the Booster.readModel method.
For example, you can sort and get the products in your commands like this:
{
  ListCartReadModels(filter: {}, limit: 5, sortBy: {
    shippingAddress: {
      firstName: ASC
    }
  }) {
    items {
      id
      cartItems
      checks
      shippingAddress {
        firstName
      }
      payment {
        cartId
      }
      cartItemsIds
    }
    cursor
  }
}
This is a preview feature available only for some Providers and with some limitations:
- Azure:
- Sort by one field supported.
- Nested fields supported.
- Sort by more than one file: unsupported.
- Local:
- Sort by one field supported.
- Nested fields supported.
- Sort by more than one file: unsupported.
It is not possible to sort by fields defined as Interface, only classes or primitives types.
Using pagination
The Booster GraphQL API includes a type for your read models that stands for List{"your-read-model-name"}, which is the official way to work with pagination. Alternative, there is another type without the List prefix, which will be deprecated in future versions.
The Read Model List type includes some new parameters that can be used on queries:
limit; an integer that specifies the maximum number of items to be returned.afterCursor; a parameter to set thecursorproperty returned by the previous query, if not null.
Example:
query {
  ListProductReadModels
  (
    limit: 1,
    afterCursor: { id: "last-page-item"}
  ) {
    id
    sku
    availability
    price
  }
}
Besides the parameters, this type also returns a type {your-read-model-name}Connection, it includes the following properties:
cursor; if there are more results to paginate, it will return the object to pass to theafterCursorparameter on the next query. If there aren't more items to be shown, it will be undefined.items; the list of items returned by the query, if there aren't any, it will be an empty list.
Using Apollo Client
One of the best clients to connect to a GraphQL API is the Apollo client. There will probably be a version for your client technology of choice. These are the main ones:
We recommend referring to the documentation of those clients to know how to use them. Here is an example of how to fully instantiate the Javascript client so that it works for queries, mutations and subscriptions:
import { split, HttpLink } from '@apollo/client'
import { getMainDefinition } from '@apollo/client/utilities'
import { WebSocketLink } from '@apollo/client/link/ws'
import { ApolloClient, InMemoryCache } from '@apollo/client'
import { SubscriptionClient } from 'subscriptions-transport-ws'

// Helper function that checks if a GraphQL operation is a subscription or not
function isSubscriptionOperation({ query }) {
  const definition = getMainDefinition(query)
  return definition.kind === 'OperationDefinition' && definition.operation === 'subscription'
}

// Create an HTTP link for sending queries and mutations
const httpLink = new HttpLink({
  uri: '<graphqlURL>',
})

// Create a SusbscriptionClient and a WebSocket link for sending subscriptions
const subscriptionClient = new SubscriptionClient('<websocketURL>', {
  reconnect: true,
})
const wsLink = new WebSocketLink(subscriptionClient)

// Combine both links so that depending on the operation, it uses one or another
const splitLink = split(isSubscriptionOperation, wsLink, httpLink)

// Finally, create the client using the link created above
const client = new ApolloClient({
  link: splitLink,
  cache: new InMemoryCache(),
})
Now, we can send queries, mutations and subscriptions using the client instance:
import gql from 'graphql-tag'

// Query the CartReadModel
const readModelData = await client.query({
  variables: {
    cartID: 'demo',
  },
  query: gql`
    query QueryCart($cartID: ID!) {
      CartReadModel(id: $cartID) {
        id
        items
      }
    }
  `,
})

// Send a command (mutation)
const commandResult = await client.mutate({
  variables: {
    cartID: 'demo',
    sku: 'ABC_02',
  },
  mutation: gql`
    mutation AddOneItemToCart($cartID: ID!, $sku: string!) {
      ChangeCart(input: { cartId: $cartID, sku: $sku, quantity: 1 })
    }
  `,
})

// Subscribe to changes in the CartReadModel
const subscriptionOperation = client.subscribe({
  variables: {
    cartID: 'demo',
  },
  query: gql`
    subscription SubscribeToCart($cartID: ID!) {
      CartReadModel(id: $cartID) {
        id
        cartItems
      }
    }
  `,
})

subscriptionOperation.subscribe({
  next: (cartReadModel) => {
    // This function is called everytime the CartReadModel with ID="demo" is changed
    // Parameter "cartReadModel" contains the latest version of the cart
  },
})
Authorizing operations
When you have a command or read model whose access is authorized to users with a specific set of roles (see Authentication and Authorization), you need to use an authorization token to send queries, mutations or subscriptions to that command or read model.
You can use Authentication Rocket to authorize operations, see its documentation and, more especifically, the Sign in section to know how to get a token. Once you have a token, the way to send it varies depending on the protocol you are using to send GraphQL operations:
- For HTTP, you need to send the HTTP header
Authorizationwith the token, making sure you prefix it withBearer(the kind of token Booster uses). For example:
Authorization: Bearer <your token>
- For WebSocket, you need to adhere to the GraphQL over WebSocket protocol to send authorization data. The way to do that is by sending the token in the payload of the first message you send when initializing the connection (see Subscribing to read models). For example:
{ "type": "connection_init", "payload": { "Authorization": "<your token>" } }
You normally won't be sending tokens in such a low-level way. GraphQL clients have easier ways to send these tokens. See Sending tokens with Apollo client
Sending tokens with Apollo clients
We recommend going to the specific documentation of the specific Apollo client you are using to know how to send tokens. However, the basics of this guide remains the same. Here is an example of how you would configure the Javascript/Typescript Apollo client to send the authorization token. The example is exactly the same as the one shown in the Using Apollo clients section, but with the changes needed to send the token. Notice that <AuthApiEndpoint> and <idToken> are obtained from the Authentication Rocket.
import { split, HttpLink, ApolloLink } from '@apollo/client'
import { getMainDefinition } from '@apollo/client/utilities'
import { WebSocketLink } from '@apollo/client/link/ws'
import { ApolloClient, InMemoryCache } from '@apollo/client'
import { SubscriptionClient } from 'subscriptions-transport-ws'

function isSubscriptionOperation({ query }) {
  const definition = getMainDefinition(query)
  return definition.kind === 'OperationDefinition' && definition.operation === 'subscription'
}

// CHANGED: We now use the AuthApiEndpoint obtained by the auth rocket
const httpLink = new HttpLink({
  uri: '<graphqlURL>',
})

// CHANGED: We create an "authLink" that modifies the operation by adding the token to the headers
const authLink = new ApolloLink((operation, forward) => {
  operation.setContext({
    headers: {
      Authorization: 'Bearer <idToken>',
    },
  })
  return forward(operation)
})

// <-- CHANGED: Concatenate the links so that the "httpLink" receives the operation with the headers set by the "authLink"
const httpLinkWithAuth = authLink.concat(httpLink)

const subscriptionClient = new SubscriptionClient('<websocketURL>', {
  reconnect: true,
  // CHANGED: added a "connectionParam" property with a function that returns the `Authorizaiton` header containing our token
  connectionParams: () => {
    return {
      Authorization: 'Bearer <idToken>',
    }
  },
})
const wsLink = new WebSocketLink(subscriptionClient)

const splitLink = split(isSubscriptionOperation, wsLink, httpLinkWithAuth) // Note that we now are using "httpLinkWithAuth"

const client = new ApolloClient({
  link: splitLink,
  cache: new InMemoryCache(),
})
Refreshing tokens with Apollo clients
Authorization tokens expire after a certain amount of time. When a token is expired, you will get an error and you will need to call the refresh the token endpoint to get a new token. After you have done so, you need to use the new token in your GraphQL operations.
There are several ways to do this. Here we show the simplest one for learning purposes.
First, we modify the example shown in the section Sending tokens with apollo clients so that the token is stored in a global variable and the Apollo links get the token from it. That variable will be updated when the user signs-in and the token is refreshed:
import { split, HttpLink, ApolloLink } from '@apollo/client'
import { getMainDefinition } from '@apollo/client/utilities'
import { WebSocketLink } from '@apollo/client/link/ws'
import { ApolloClient, InMemoryCache } from '@apollo/client'
import { SubscriptionClient } from 'subscriptions-transport-ws'

let authToken = undefined // <-- CHANGED: This variable will hold the token and will be updated everytime the token is refreshed

function isSubscriptionOperation({ query }) {
  const definition = getMainDefinition(query)
  return definition.kind === 'OperationDefinition' && definition.operation === 'subscription'
}

const httpLink = new HttpLink({
  uri: '<AuthApiEndpoint>',
})

const authLink = new ApolloLink((operation, forward) => {
  if (authToken) {
    operation.setContext({
      headers: {
        Authorization: `Bearer ${authToken}`, // <-- CHANGED: We use the "authToken" global variable
      },
    })
  }
  return forward(operation)
})

const httpLinkWithAuth = authLink.concat(httpLink)

const subscriptionClient = new SubscriptionClient('<websocketURL>', {
  reconnect: true,
  // CHANGED: added a "connectionParam" property with a function that returns the `Authorizaiton` header containing our token
  connectionParams: () => {
    if (authToken) {
      return {
        Authorization: `Bearer ${authToken}`, // <-- CHANGED: We use the "authToken" global variable
      }
    }
    return {}
  },
})
const wsLink = new WebSocketLink(subscriptionClient)

const splitLink = split(isSubscriptionOperation, wsLink, httpLinkWithAuth)

const client = new ApolloClient({
  link: splitLink,
  cache: new InMemoryCache(),
})
Now, when the user signs-in or when the token is refreshed, we need to do two things:
- Update the global variable
authTokenwith the new token. - Reconnect the socket used by the subscription client by doing
subscriptionClient.close(false).
You might be wondering why we need to do the second step. The reason is that, with operations sent through HTTP, the token goes along with every operation, in the headers. However, with operations sent through WebSockets, like subscriptions, the token is only sent when the socket connection is established. For this reason, everytime we update the token we need to reconnect the SubscriptionClient so that it sends again the token (the updated one in this case).
The GraphQL over WebSocket protocol
Sockets are channels for two-way communication that doesn't follow the request-response cycle, a characteristic feature of the HTTP protocol. One part can send many messages and the other part can receive all of them but only answer to some specific ones. What is more, messages could come in any order. For example, one part can send two messages and receive the response of the second message before the response of the first message.
For these reasons, in order to have an effective non-trivial communication through sockets, a sub-protocol is needed. It would be in charge of making both parts understand each other, share authentication tokens, matching response to the corresponding requests, etc.
The Booster WebSocket communication uses the "GraphQL over WebSocket" protocol as subprotocol. It is in charge of all the low level stuff needed to properly send subscription operations to read models and receive the corresponding data.
You don't need to know anything about this to develop using Booster, neither in the backend side nor in the frontend side (as all the Apollo GraphQL clients uses this protocol), but it is good to know it is there to guarantee a proper communication. In case you are really curious, you can read about the protocol here.
The WebSocket communication in Booster only supports this subprotocol, whose identifier is graphql-ws. For this reason, when you connect to the WebSocket provisioned by Booster, you must specify the graphql-ws subprotocol. If not, the connection won't succeed.